Before delving into the topic right away here are a few checkpoints you can go through to ensure your some level of data security. Two-step authentication: This feature comes in very handy as it adds an extra layer of protection to your account. Set up two-step authentication and you can find if someone is trying to gain access to your iCloud. You would receive a verification code on your device associated with Apple ID. Apple Mail: Even if someone manages to get the verification code from your trusted device and tries to log in. You would be notified via email from the Apple Support team with login details on your registered email linked with your Apple ID. Take note of such messages and act immediately. Moving on these are the steps to check the devices you’re logged in to with your Apple ID. The process varies with the different devices.
Check using your iPhone, iPad, or Watch to Check where you’re signed in
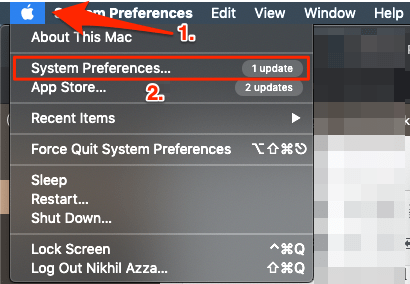
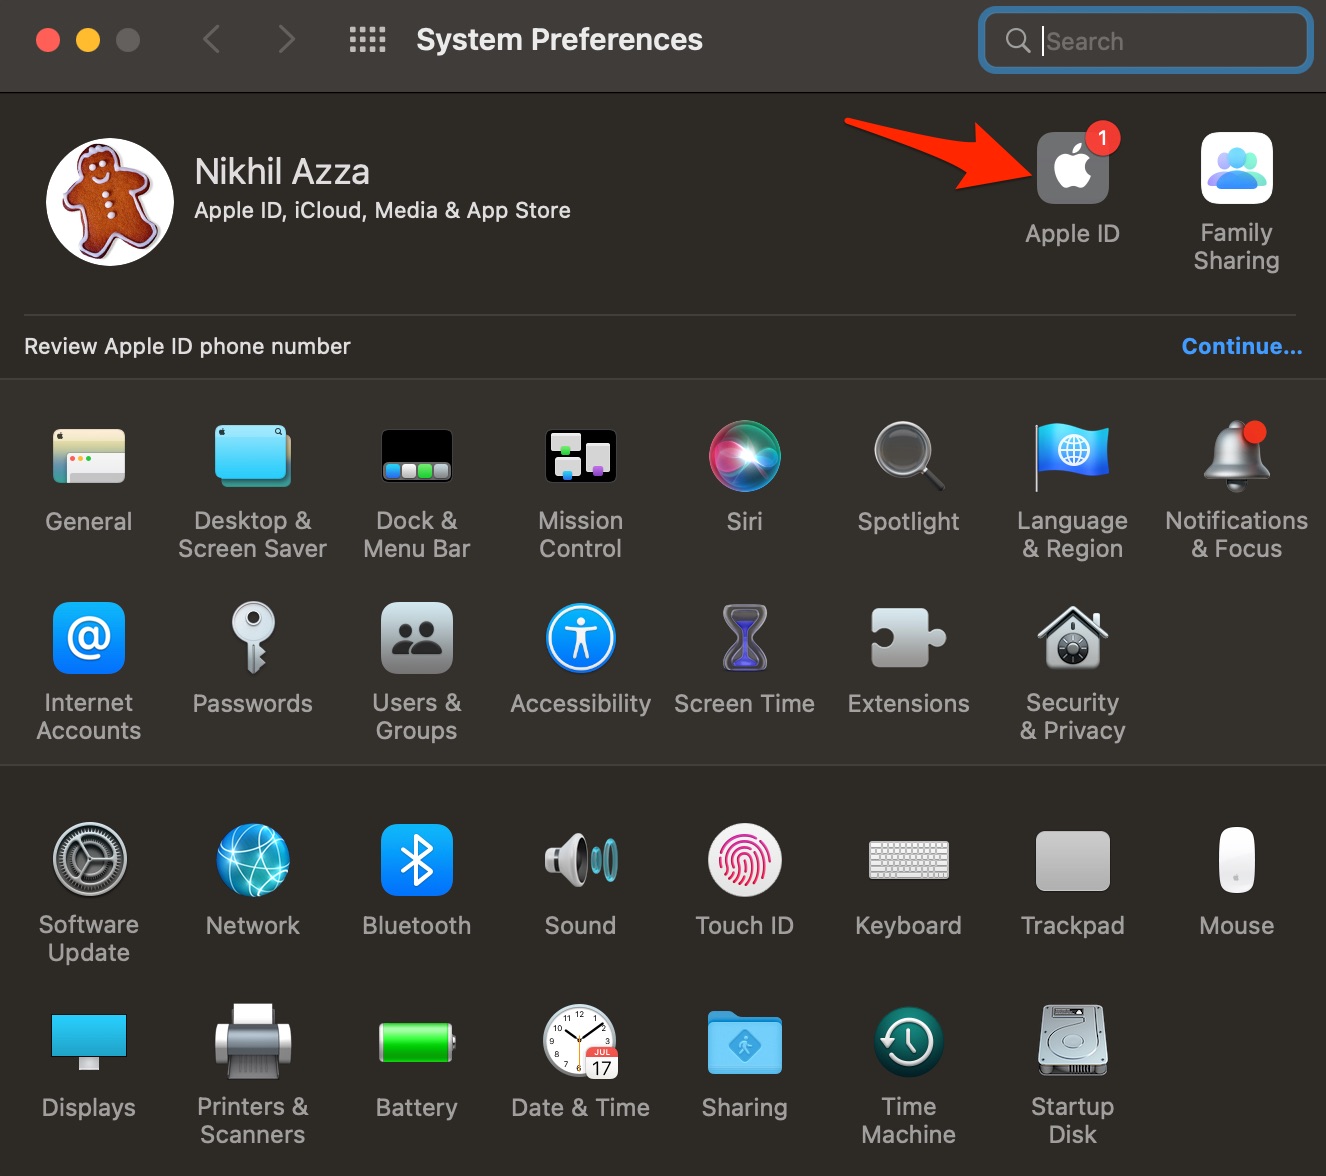
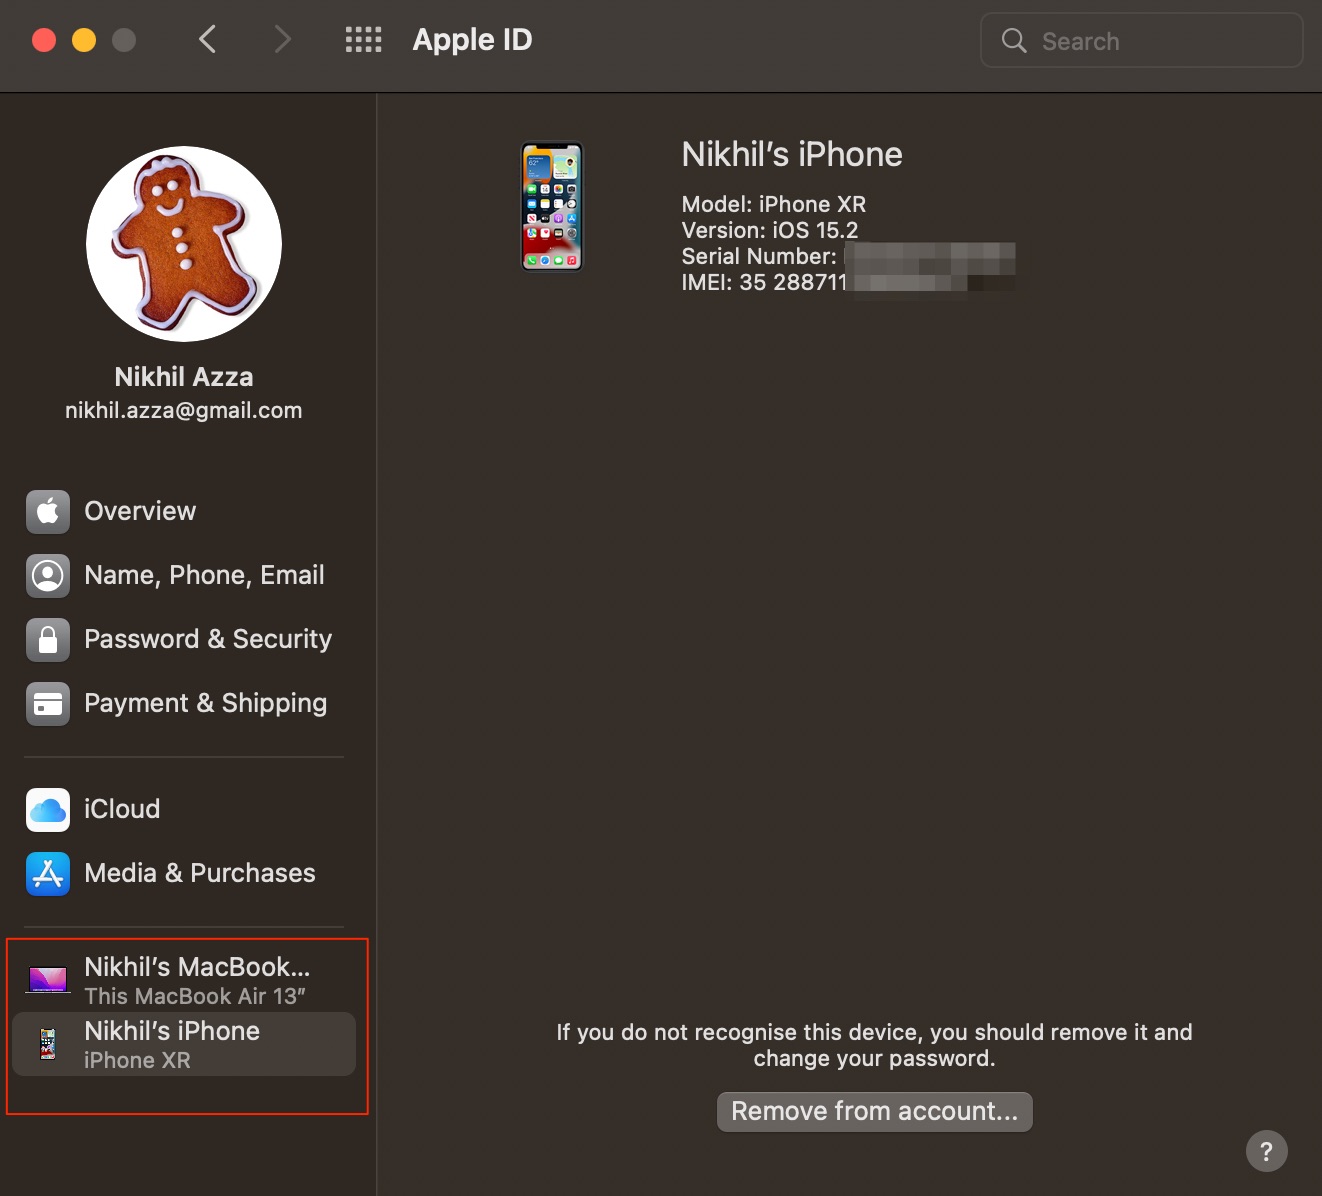
Check Mac to see Where you’re Signed in
Use Windows PC to see where you’re signed in
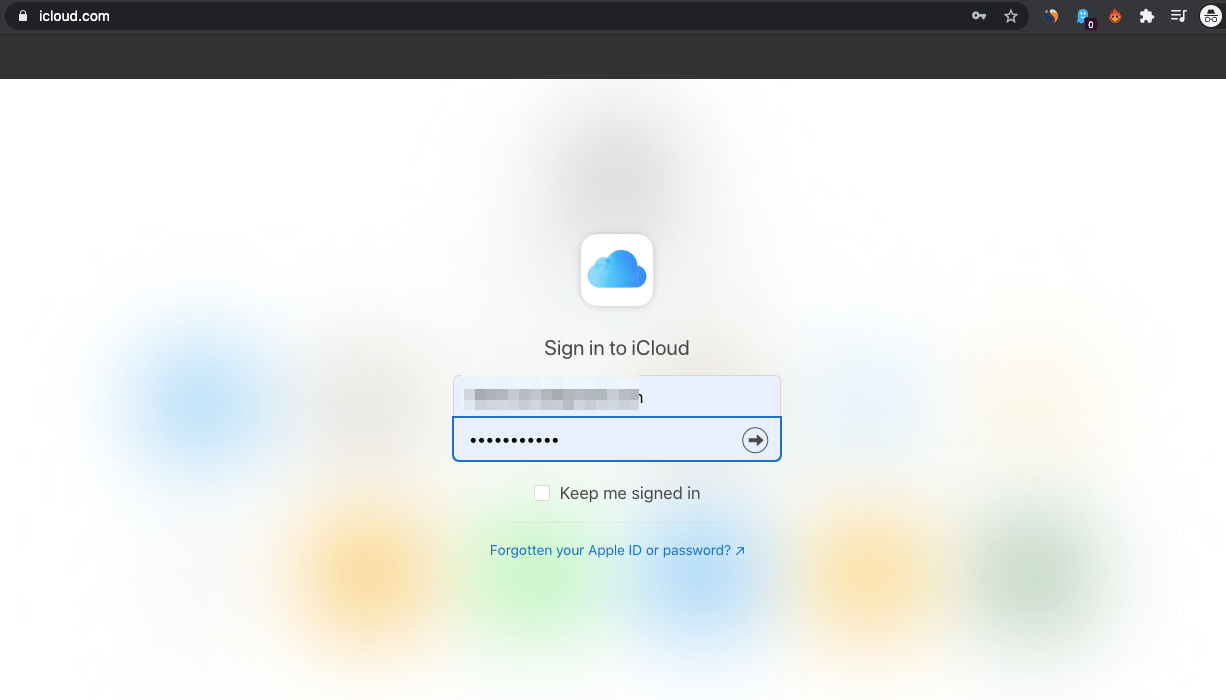
Use the Web to See Signed in Devices
Now that you know how to view the devices associated with your account. You can also go ahead and add or remove any device(s).
Add a new device
To add a new device to the list, sign in with your Apple ID. After you sign in on a device using Apple ID, that device appears in the list. Here’s where you need to sign in: For iOS or iPad
Sign in to iCloud, iMessage, FaceTime, iTunes & App Stores and you are good to go.
For macOS
Log in to iCloud on the device.
Remove a device You might find a device that you feel shouldn’t be on the list. Tap on Remove from Account and confirm the action. Once the device is removed, it also gets disconnected from iCloud and disables its use as a trusted device, and is omitted from the list Instead of specifically removing a device from the list you can simply click Sign out of the iCloud option and your job is done.


